Showing posts with label DIY. Show all posts

Tuesday, May 3, 2016

Balloon Time Helium Tank Review

diy helium tank
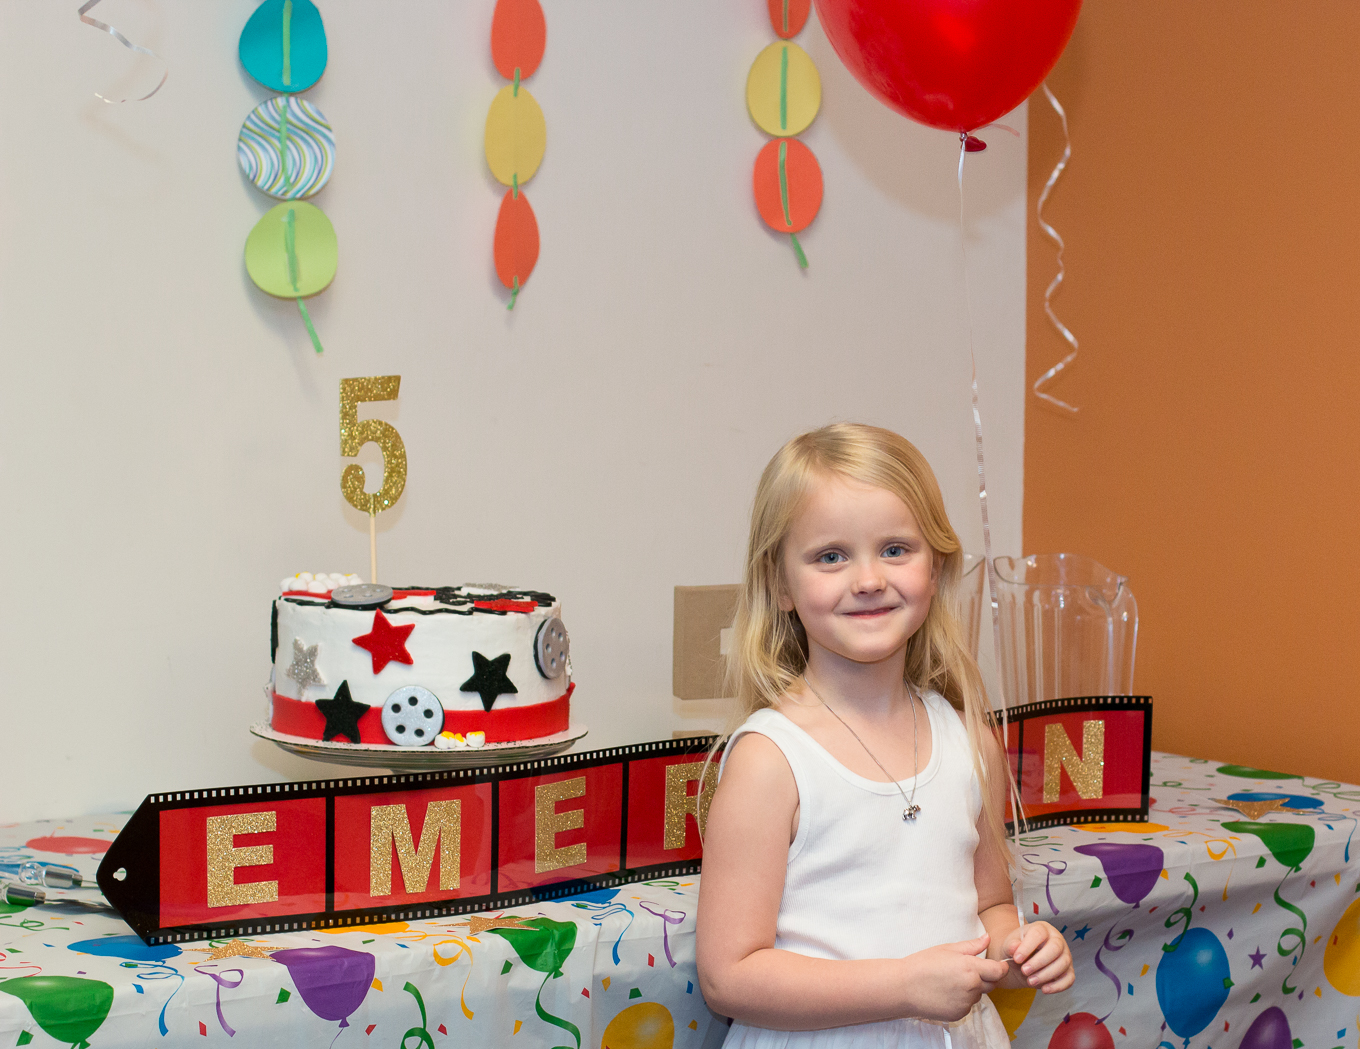
My little one just turned 5! Since we've been back around our family we usually do my kid's parties at a venue. This time my little one choose the movies. Yay! I've never done a movie birthday party before. We watched The Jungle Book. Which is a little intense. The birthday girl actually had to come and sit on my lap. Lol. I love her still being little.

decorations for birthday party

helium tank
I never can just come to a party. I have to bring the party too. So, when I was asked to review Balloon Time Helium Tanks...I jumped at the chance. But before I went and got the tank we still hadn't decided on a venue for the party. So, I literally drove this tank to another state. One of the little things that is easily overlooked is the packaging. Well besides the tank being super light it has these two little holes on the side of the box. These are for your fingers so you can carry it. This was wonderful to have since I had to carry it from the car to the room at the theater and had tons of other stuff to carry as well. The tank isn't heavy but it's awkward so those little finger holes make it EASY to carry. It's the little things people...and this is one of them.
diy balloon air

The tank is so easy to operate. Even a child could do it. And that is exactly what happened while I was acting like a crazy maniac to get the room setup. My other daughter, a 9 year old, and mother blew up all the balloons. She aired them while my mom tied them. You can guess what her duty is going to be at the next party;)  The room was filled with balloons but amidst the chaos I forgot to take a picture of the ceiling. Balloon Time Helium Tanks are great if you are at a venue and need to air up balloons there. Because trust me I and my husband both have driven with a car full of balloons and it is not fun. Then try getting them outside inside without them getting tangled up. It's. not. going. to. happen.

Thanks Balloon Time Helium Tanks for sending me the gift card for the tank. I am sold! I won't do a party without my OWN Balloon Time Helium Tank.

Tuesday, September 15, 2015

How to Keep Your Plants Alive While Away on Vacation

Have you ever wondered how to keep your plants alive while your away on vacation? Me too!!! I searched high and low and found this method. I wasn't sure it would work, but it did. Insert happy dance here. Plants and flowers for some reason make me happy:) I really enjoy them and when my husband decided on a vacation this summer I thought how in world am I going to keep my flower baskets watered? I was seriously about to buy one of those shirts that say "I can't go....My plants need me."

So here it is.
  • You'll need a big container (I used the largest kitchen pot)
  • Twine 
  • Scissors to cut the twine
  • Screwdriver, optional. I used it to poke a hole into the soil where I put the twine into.
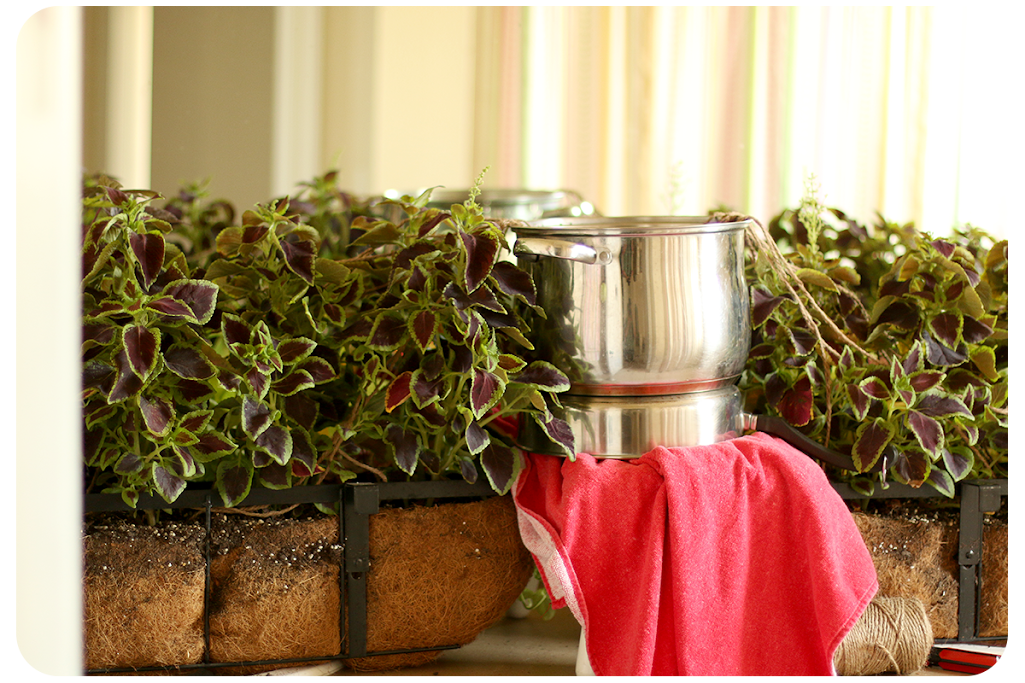
So, I think the pictures make it pretty self explanatory. Fill a large container to the brim with water, soak the twine in the water until thoroughly wet, then put one piece of the twine in the pot and another end into the soil. Space out the twine so equal parts of the plant will get watered. I was gone 10 days and noticed that a little bit on the end of one plant got a tinge of yellow (meaning that part got over watered). I never imagined it would get over watered.
plants water themselves
It was really hard to get a good shot of the plants in my tiny bathroom. But this should give you an idea since you'll have a different size of plants than I have anyways. I have flower planters that hang over my deck railing. I wanted to originally put them in the bathtub to create less mess but they needed something to support them from falling over.....so the bathtub was a fail. I then thought I might be able to put each one in front of each sink and (the faucet would be the brace) to keep them from falling over. Bingo bongo! Then, I need something to elevate my pot of water. The pot needs to be elevated to wick the water down through the twine. I used my 4 year old's step stool but needed more height so I got a skillet and put that under the pan. I also covered the stool with a towel since it was wood and she'd totally freak out if it got messed up.

self watering plant system
Here you can see the water soaked twine that ran from the water pot to the plants. I put approximately 8-10 strands of twine for each plant and my planters are 3 feet wide.

I used a screwdriver to poke holes in the dirt and place the twine as far down as I could.  The roots is where the water needs to get to.

plants that water theirselves

This is a close up of what my plants (coleus and sweet potato vines) looked after 10 days of the self watering system.

how to water plants while on vacation

My pan of water was bone dry so I should have used a bigger pan but didn't have one. I'm not sure when the water ran out but do know it did a great job of keeping my plants alive while I was away. There was NO WAY they would have survived in the 106 degree temps we were having in Texas. I'm sure also the cooler temps inside also added to the survival but you can believe next time I go out of town, which is quite often this is the system I will use. Sometimes you just don't have someone to water the plants or want to bother them for that many days. This way the plants water themselves!!!

Thursday, July 18, 2013

"Diary of a Wimpy Kid" Birthday Party

Diary of a wimpy kid cake


Diary of a wimpy kid homemade cake
I went to Walmart and had them make an 8 inch round plain cake.  I didn't want to stress over "making" the cake.  Now, I wish I had just made the cake. They didn't do any better of a job frosting it than I would have.  I think the baker was new.  But for $6.50 what more can you ask for? Well I could have asked for aleast the right flavor of cake it was supposed to be chocolate inside but instead was white. 

But anywho. I thought working with fondant was going to be easy.  Turns out not so much.  Well let me rephrase it is easy to work with if you know the right consistency/texture it is supposed to be.  The black fondant just wasn't working with me so on to plan b.  I had originally bought some sugar sheets I saw at Michael's but returned them because I thought it would be easier/cheaper to make my own fondant.  Not so much.  I went and rebought the sugar sheets.  I am a perfectionist so I didn't want to cut the sugar sheets with scissors.  I started looking at it and thought I could cut this with my Silhouette.  I started looking online and sure enough you can.  I had kept my old blade because I saw some where that you could resharpen it by cutting tin foil with it.  It worked and it made it sharp again.  I used this blade (my now food cutting blade) to cut the sugar sheet.  I used the setting for regular cardstock and it worked like a charm.  Just be sure and not to do a double cut.  It never seems to make the exact same cut.  I made my own design using my Silhouette with an image of "Greg Heffley" I found online and used one of the pre-installed scallop border for the border.  This lovely lady tried to help me with the graphics she used but at the time I didn't know how to convert an svg file and make my Silhouette recognize it. 

So for a cost break down of the cake:

$6.50 for the cake
$4.00 for the fondant (makes way more than you will need)! Letters around the cake
$2.50 for the Greg cut out on top
$2.50 for the scalloped border
Total: $15.50

I could have used the sugar sheets for letters that went on top of the cake but I wanted something that had some dimension and stood up.  The sugar sheets are really flat which worked really well for the border and the Greg figure.

Cheese touch cupcakes
Here are store bought cupcakes (Walmart to be exact) $6.00 for a dozen.  I made marshmallow fondant and made cheese toppers.  They turned out great!

Diary of a wily kid cake display
I wish I had gotten a better picture but here it is all set up at the party with the cupcakes surrounding it.

Diary of a wimpy kid banner
Zoo Wee Mama pennant banner made with Silhouette.  I feel like this is a sponsor for Silhouette with as many times I am going to be mentioning it but it isn't I just really use it a ton for parties.

Diary of a wimpy favors
Here is what was in their goodie bags.  A full size "diary".  These were on sale at Walmart for 50¢ each.  I then used this premade label personalized it, resized it to fit my notebook, and printed it out on full sized label paper.  Dollar Tree had pop rocks 3/$1 so one of those went into each bag. I absolutely loved the Rodrick Rule snickers bag that I simply printed out on cardstock.  I bought the snickers for the Rodick Rule at Dollar Tree 6 fun size/$1 but I looked at Walmart after I bought these and they had them cheaper. Keeping with the same Dollar Tree theme I bought a box of pencils.  You can't see it some how I forgot to untuck it from under the Snickers is an "Oh no! You now have the cheese touch I made out of cardstock on the Silhouette.  Michael's had their scrapbook sale so the paper was 20¢ a sheet.  I used for 4 sheets since that was how many I could fit on mine but if you have a cameo you could fit more. The popcorn bags held all the small suff and were 10/$1 at Dollar Tree.

Diary of a wimpy kid party inspiration
Here is my beverage bin all vinyled up. 
I think this is my most used party item.  I bought this at Target years ago and then went back and bought the stand that went with it. So glad I did.  It is so simple to personalize.  Since I'm no longer afraid of vinyl (no idea why I was to begin with, it is so simple to use) I cut out whatever the theme is and attach it right to the bin.  When the party is over :( I just simply peel it off.

Personalized wimpy kid water
Of course you have to have personalized water bottles to go with the personalized water bin. I made this using my Silhouette. Use regular copy paper if you are going to laminate them, by laminating them I mean encasing them in packaging tape. If you won't be putting them in a bin of water then you can use cardstock which holds up better if they aren't laminated.  If they are laminated the cardstock is just to stiff and your label will want to untape itself after you apply them to the bottles.

Pin the Booger on Game
Here is the "Pin the Booger on" game.  All it is a poster I bought on Ebay for $7.99 and for the boogers we used some cut up frogs that were sticky that we used for a previous party favor (you can get them at Target in the favor section).

Game ideas
All the boogers "pinned" on.  We just wrote on the poster the child's name or initals to keep track of who's boogers were who's.

photo props
Here are some of the kids posing with their character masks.

Diary of a wimpy kid photo props
I didn't know if the kids would know which character drawing was which so I put in vinyl the names on the back of the popsicle sticks.

birthday gift wrap
Personalized gift bag for the Birthday Boy.

diary of a wimpy kid party favor cup
Used my handy dandy Silhouette machine to cut out an image of Greg for a personalized cup for the birthday boy. It turned out really cute! 
party games
It was so hot so outside they went out for some water fun.

party activities
All kids love cotton candy! The birthday boy has this cotton candy maker on speed dial.....seriously!


diary of a wimpy kid cake
Birthday boy with his cake.


Party inspiration and links:


Thursday, May 16, 2013

Girl Scout Water Bottle or Drink Container

Girl Scout Water bottle


I volunteered to help with my daughter's end of the year Girl Scout party.

This is what I came up with.  I used this same idea also for the Batman party I helped plan.   I topped the water bottles off with a brown and white polka dotted ribbon just to make it cuter for presentation and because they will now be officially be Brownies and no longer Daisy's. My little girl is getting so BIG!

Update: I sell something similar to this now in my Etsy Shop.

Apparently, you can't sell anything remotely related to Girl Scouts. Even the flippin words Girl Scouts are trademarked and removed them from my Etsy shop.  

Update: 2019 Fully stocked for this season!

5/15/18 less than 20 water bottles left.

5/18/17 UPDATE I ONLY HAVE 40 WATER BOTTLES LEFT!!!

Contact me about placing your order! mspaytonjones@yahoo.com

2/5/17 UPDATE: Reordering stock today. Order soon! I sold completely out last year before the end of Girl Scout season! Looks like the bottles will be back to the longer one's (like the first picture above)


Girl Scout Water bottle


Friday, February 3, 2012

100th Day of School Shirt

fabric applique 100th day shirt
In Kindergarten it is a big deal for the 100th day of school.  So of course we had to make a shirt to celebrate this glorious occasion.  I would have showed you what I did but it is pretty self explanatory.  I used this tutorial for the roses (which I thought were kind of too big) but Payton insisted that we put them on....she's fancy like that.

I printed the numbers out of my computer using Microsoft Word and then used them as my pattern.  Yours might be different in size depending on the size of your child/shirt.  I used scrap material, cut out my numbers and pinned them on the shirt.  I SHOULD have used steam a seam and it would have been so much EASIER but I didn't have any and didn't want to go to the store.  I bought this shirt at Target just for this project so all it had to last was for one day.  If you want something more permanent then you should definitely use the steam a seam. 

Overall I was happy with the shabby chic look it had and Payton was happy too.  Happy 100th day of school.  I'm so proud of my "big" girl.


Monday, January 9, 2012

Pottery Barn Santa Clause Canvas Knockoff

pottery barn santa canvas

Well here is my first attempt to recreate a pin I did off of pinterest.

It is no way perfect but good enough for me.  I kind of went off of these directions from a pin I pinned on pinterest. I am unfamiliar with the grid system she refers too but I guess it would work.  I just winged it and didn't have as great of results as she did but again....good enough for me. 
Materials: I used a large piece of wood I got from Lowe's and had them cut it down to a 48 x 48 square.  I came up with this number based on the space I had to fill above my mantle. You could use anysize you wanted that is the beauty of it.  I had originally wanted to use a canvas this size but Michael's didn't carry that size and Hobby Lobby was too far.  I think that the canvas would be an excellent option.
Next, was a pint of mistint paint at Lowe's used to paint the board a solid color.
Finally, I used a pencil to sketch the outline and  3 oil based sharpie to color it in.

So for under $30 dollars I had a custom piece of art work to put over my mantle instead of the $299 price tag from Pottery Barn. (Which apparently was sold a few years ago and they didn't carry it this season even if I had wanted to fork over that much cash....which I wouldn't have.)
Pin It
Related Posts Plugin for WordPress, Blogger...